"Makeover" may be not even been the right word for what we took on in our yard last Fall. A "makeover" implies that something was once made, and I'm not sure our yard ever was!
 |
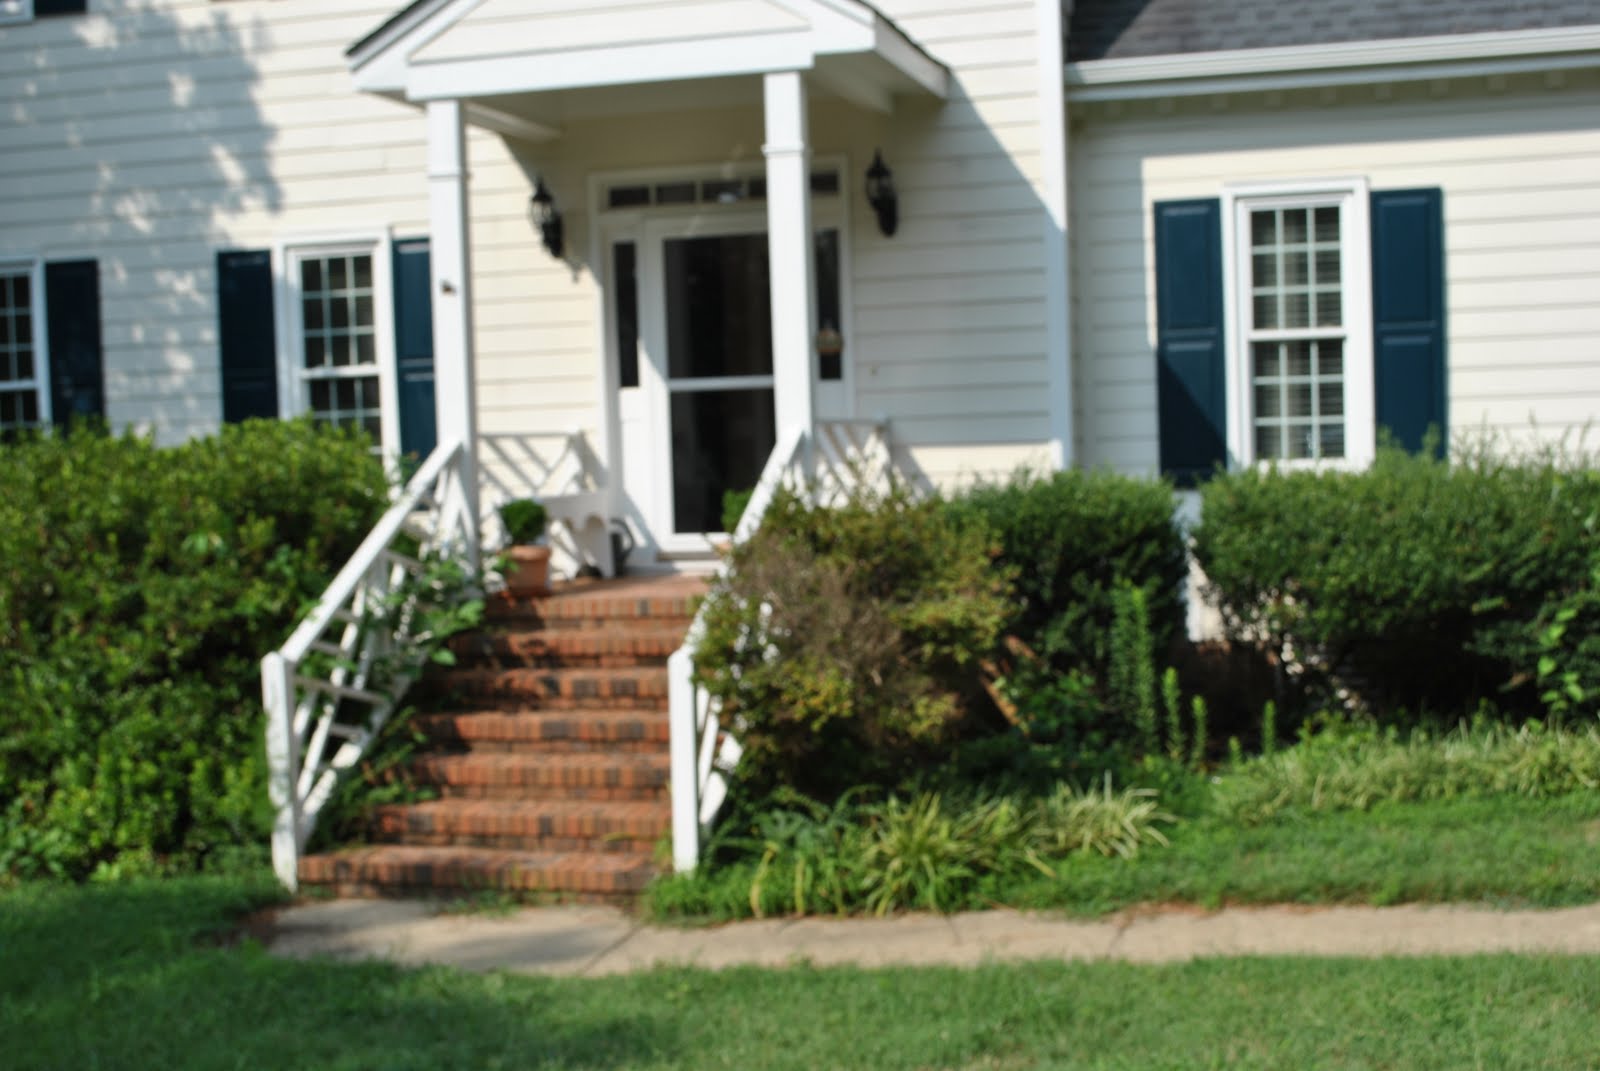
| A photo of our front yard from when we purchased the house in the Fall of 2009. |
 |
| A concrete right angular path sloped down from the side walk to the front stoop which was a trek at 7 steps! |
 |
| The yard was complete with a circle of Azaelas..... not kidding! |
 |
| While we had azaelas on the left side of the house, the right side had mismatched boxwoods and hollies, and scattered variegated liropie and day lilies. The metal lamppost was another landscaping misfit. |
Our house wasn't exactly marketed as having a "crawl space swimming hole", however shortly after moving in we realized that was exactly what we had. The only good news is that remedying our little real estate nightmare, meant that we had to put in a foundation drain and regrade the front yard, thus mandating the removal of the existing landscape and its 8' tall overgrown azaleas. So, whereas my typical landscape design process looks something like me sitting around the dining room table with stacks of gardening books, a trusty "s" curve, tracing paper and some vino for inspiration; instead, we hired out the design this time since it was more of an engineering solution that we needed.
 |
| Dutifully working on a landscape design. |
We worked with several companies on the project:
Raleigh Sod and Landscapes and their partners did the engineering work, tear out, and foundation drain; and
Southern Landscape Professionals did our design, walk, grading and plant installation. I worked with Barry at Southern Landscape closely on the design. We talked through our requirements for the space and ideas I had. I knew I wanted a curved brick pathway to the front door, a nice wooden lamp post, and a focal point with a bench in the corner of the yard that could be viewed when guests were walking up the path. I also knew I wanted few blooms in the front and most of the color to come from foliage and small annual beds. Since time for yard work is scarce these days with the kiddos, a low maintenance and neat design were a must! I provided Barry a list of plants that I liked and photos of homes that appealed to me. With Barry's expertise, we talked through solving the need to screen the view of my neighbor's front door, how to hide our trash cans and removing shrubs along along the driveway so that passengers could easily get out of their car when coming to see us. He also talked me out of some of my bad ideas, like the desire for a specimen tree out front - no room! We haggled over plants (mostly his need for my yard to have Nandinas) and after much back and forth and a trip to the nursery and
arboretum, we settled on a plan.
 |
| The final design for our front yard. |
Our plan included regrading the yard and the harsh discovery that "cheap as dirt" is a lie - dirt is not cheap! We planned to remove two steps from our stoop making the walk from the driveway level and not downhill. The concrete L-shaped sidewalk would be removed and a runner bond brick path would be installed in its place. The plans would include the purple hues of Purple Diamond Loropetalum, the dark green glossy foliage of Otto Luykens, Oakleaf hollies to frame the ends, Suffruticosa Box to denote the entryway, dwarf compact hollies (Vomitoria Nana) and Yuletide Cameila Sasanquas.
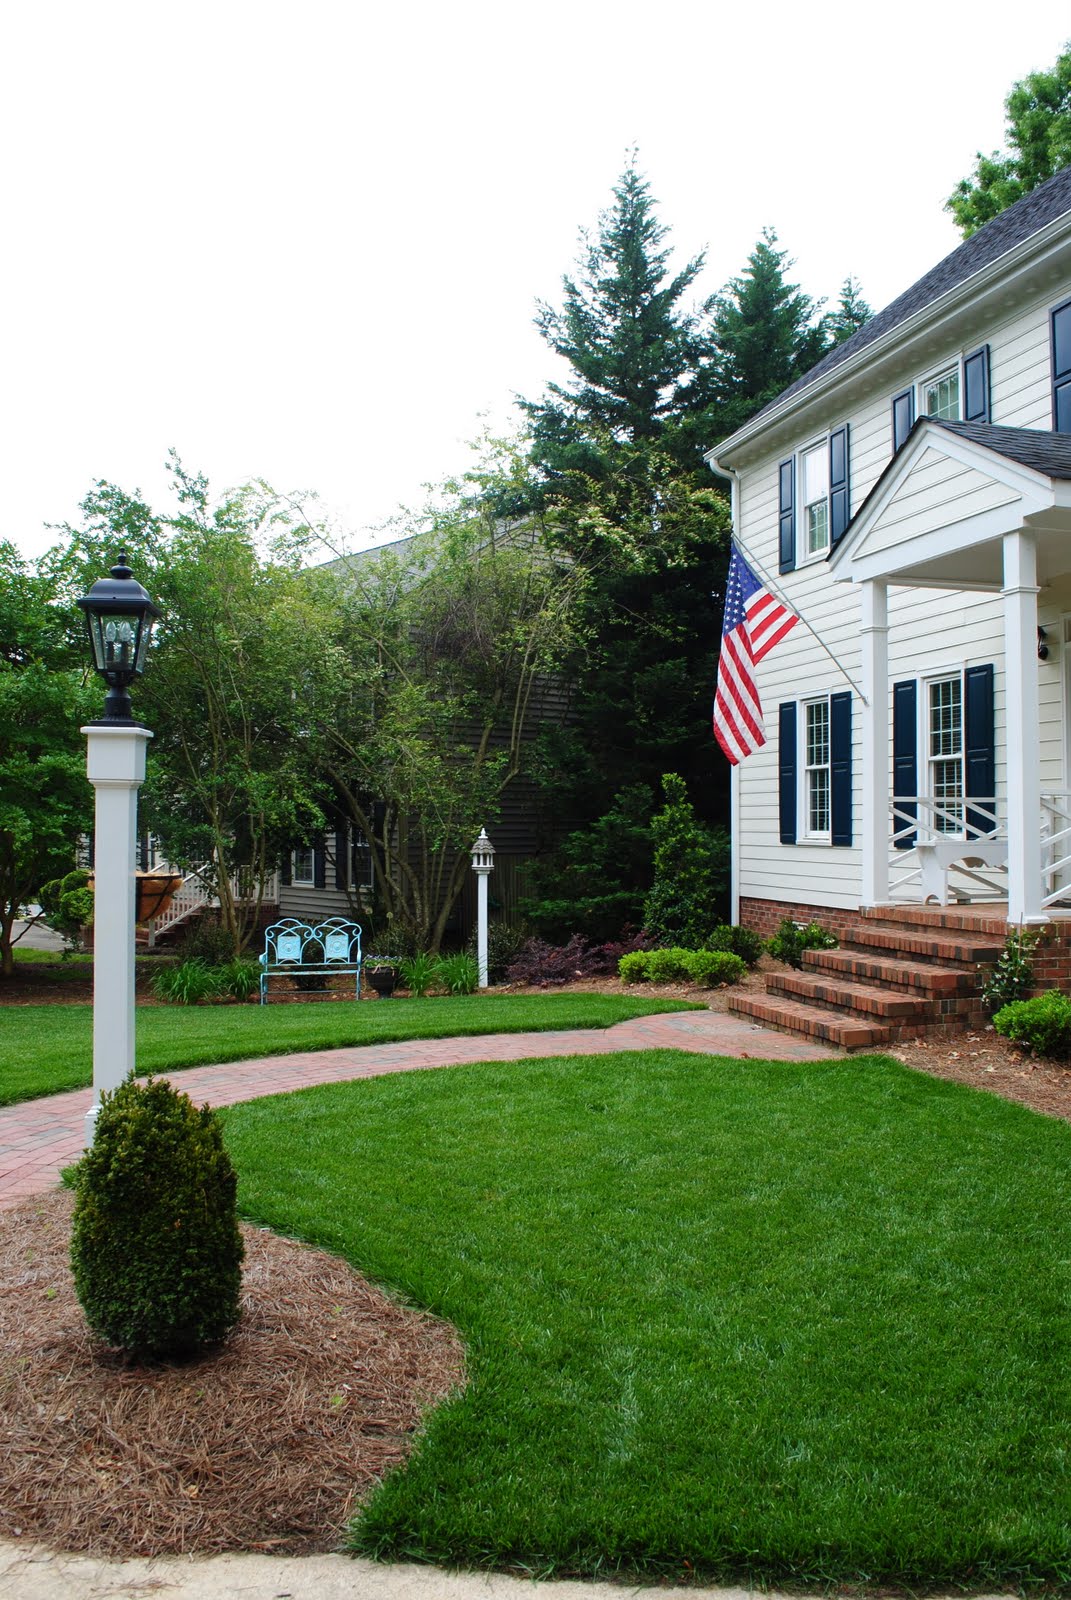
The work started in late July and the sod finally went in in September. Here are some "after" photos of the work - what a difference a year makes! Oh and the best part is that crawl space is bone dry!
 |
| Our corner focal point. |
 |
| The new front stoop in the snow! |
 |
| While I realize this doesn't look like much, its come a long way. When we moved in, it was green with mold and the post was buried in weeds. We painted it, got new crisp house numbers, added some stones and annual color and while its not much - it makes me happy! |
Next up for the front is a fresh coat of paint on the house and I'm thinking "green"!